Moderation Tools
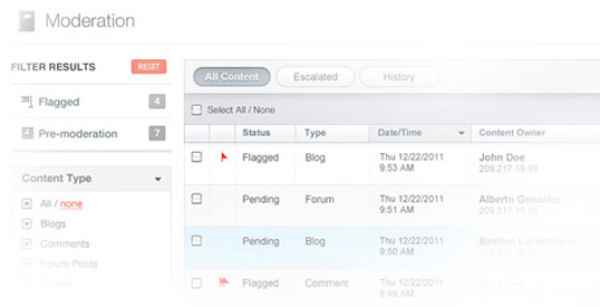
ONEsite offers a very robust and versatile moderation system. Designed to give administrators and moderators the most control possible from a single location, the Quick Moderation system displays all content needing moderation on your network with advanced filters options to allow you to further customize your view. The moderation tool set also includes:
- Filters for profanity, potential spam, white and black-listed URLs, and more
- Banning of IPs, usernames, and email addresses
- Spam prevention
- Notifications for pending moderation events

Manage a User
You are an administrator or moderator and need to look up a user to remove a questionable avatar.
- Log in to the Control Panel with your personal account information
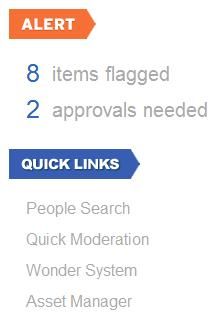
- Click on the People Search link in the Quick Links box on the right side of the page. This will load the user search tool.
- Search for the user you wish to manage. By default the search field will search on:
- name
- URL
- username
- email address
- All users matching your search criteria will display below the search form. Click the Manage link to the right of the username you wish to manage.
Advanced options are available to search deleted or suspended accounts as well as to display recent signups. Now that you have selected a user to manage you will be presented with selected details about that user as well as links to all actions you can take.
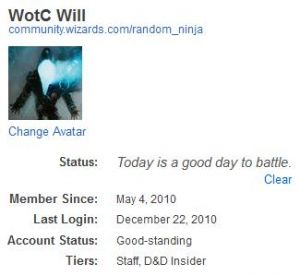
Search Results – User Summary

You may select from the following options or return to the search user from:
- Email the user
- Edit the user profile
- Reset the user avatar
- Edit the user’s account information
- Warn the user
- Apply a cookie ban to the user’s account
- IP ban the user
- Delete the user’s account
- Send the user their password
- Reset the user’s password
- View the log for all moderation events related to the user
Once a selection has been made, a new form will open below the user summary to allow you to complete your requested task.
Search Results – User Summary
- Email the user
- Edit the user profile
- Reset the user avatar
- Edit the user’s account information
- Warn the user
- Apply a cookie ban to the user’s account
- IP ban the user
- Delete the user’s account
- Send the user their password
- Reset the user’s password
- View the log for all moderation events related to the user
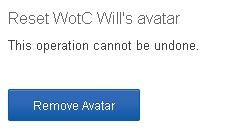
Example – Reset User Avatar

- Click the Reset Avatar Button
- The new form opens with a summary of the action you have requested to take and a warning that the operation is final.
- Click remove avatar.
- The user’s avatar has now been reset to the network default.
Manage Flagged Content

You are an administrator or moderator and have received an email indicating content has been flagged on your network.
- Log in to the Control Panel with your personal account information.
- Click on Flagged Items in the alert box on the right side of the page.
- Select an item by clicking on the appropriate row in the list. This will populate the preview window below.
Each preview will include:
- User Details – avatar, username, name, last known IP, and links to the user’s profile
- User Action Links – warn, suspend, delete or manage the owner of the content
- Flag Action Links – remove flag or delete content
- Flag Information – this link opens a popup to allow you to see the specific details surrounding each submitted flag on the content.
- View in Context – this opens a new window and shows the content item in its original location and format. For example, view in context for a forum post will load the entire threaded conversation the post was from.
- Content preview – The information displayed will differ based on the content type of the item flagged. For example, a blog post would display the title and body of the post. If the flagged item was a video or podcast, this area would also act as a player for the content.

Approve Pending Content
You are an administrator or moderator and need to respond to pending content on your network.
- Log in to the Control Panel with your personal account information.
- Click on Approvals Needed in the alert box on the right side of the page.
- Select an item by clicking on the appropriate row in the list. This will populate the preview window below.
Each preview will include:
- User Details – avatar, username, name, last known IP, and links to the user’s profile.
- User Action Links – warn, suspend, delete or manage the owner of the content.
- Premoderation Action Links – approve content, deny content or escalate for admin review.
- Content preview – The information displayed will differ based on the content type of the item flagged. For example, a blog post would display the title and body of the post. If the pending approval item was a video or podcast, this area would also act as a player for the content.

