- Home
- Guides
- Control Panel
- Tier Management
Overview
On the ONEsite platform, a tier at its base is simply a bucket of users or groups. It is a way to categorize users or groups together to give them certain permissions or visibility. However, tiers are one of the most versatile and well used features of the platform. There is very little limit with what can be done using tiers and a bit of creative thinking.
Possible uses for a tier
There are endless uses to the tier system. A few of the most common are listed here:
- To set a group of users as admin or moderators who have special access or responsibilities
- To highlight certain users or groups and their content
- To identify sponsored or celebrity users or groups from normal users and groups
Possible characteristics of a tier
- Their own profile(s) – assign a separate set of questions for members of a tier to fill out. For example, if your site has staff that participate in the community, they could potentially have different information you’d want highlighted as compared to a normal community member.
- Specific permissions – to the photo gallery, video gallery, calendar, message center, and more
- Custom themes
- Custom page templates
- Modules can be set up to only show content from a single tier of users. In the example below you see a module with three tabs, each focused in on a tier the site wished to highlight.

Managing your tiers
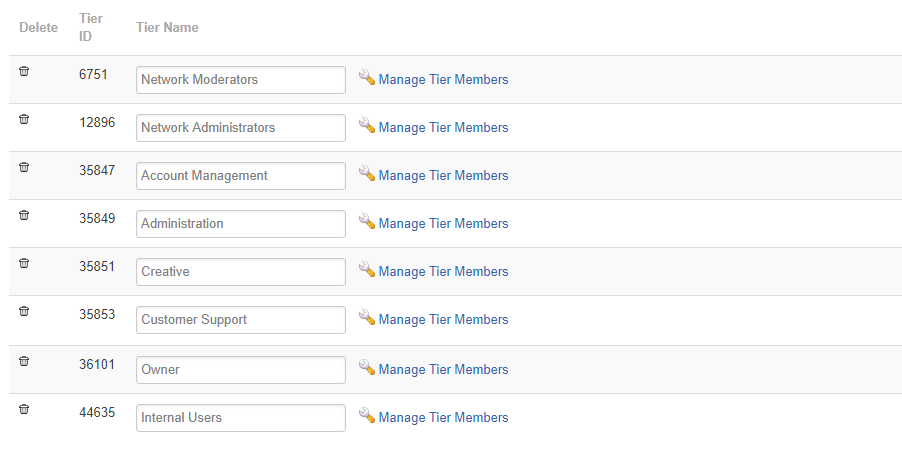
The Tier Management feature can be accessed from the main Control Panel at Users & Groups > Tier Management.

Create a new tier
To add a tier, click the Add New Tier button. Name your tier and select the components available to members of that tier. By default, all components are available to all users.

Managing Tier Members
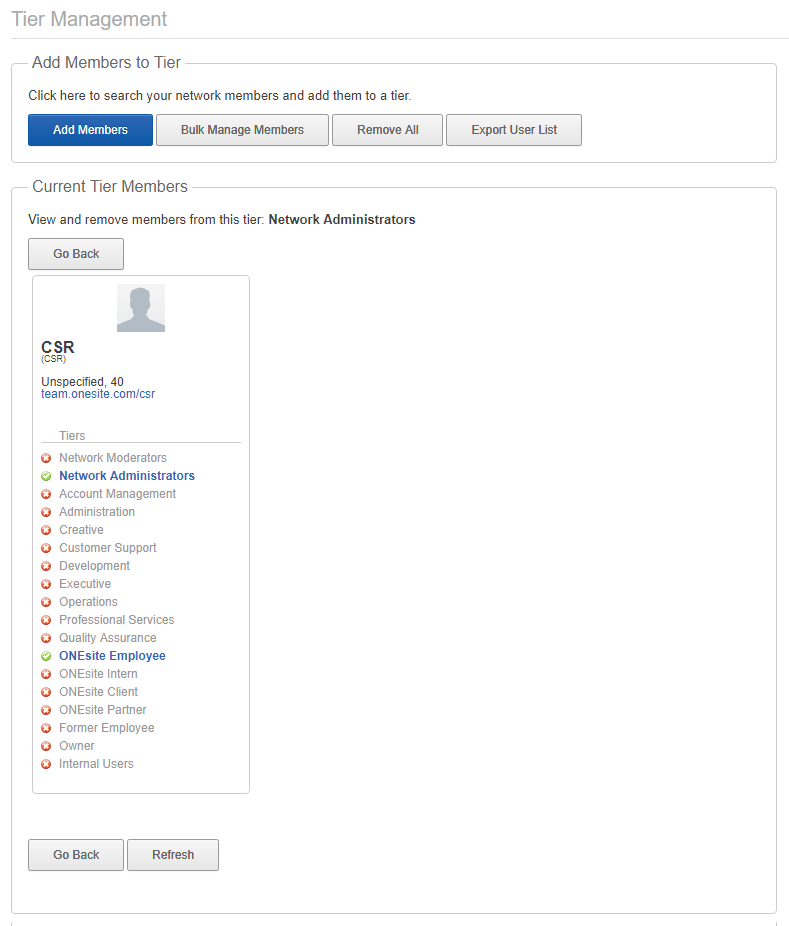
There are three options for managing tier members:
- add members
- bulk tier management
- remove all
After hitting the Manage Tier Members link under a tier name, you see the following. Any users in your tier will be displayed at the bottom of the page. This list will also show all tiers each user is in.

Adding Users to a Tier
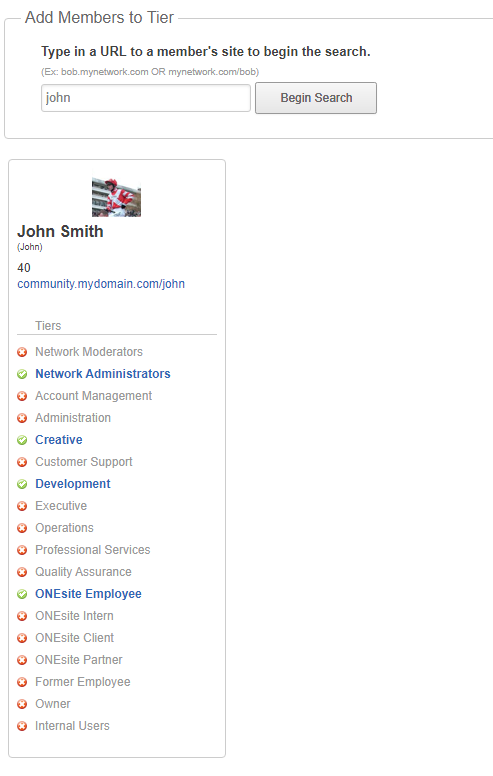
To add a member to a tier you will need to knowthe user’s URL. For example: sally.yourdomain.com or yourdomain.com/sally.
- Type the user’s URL into the search box. Any results will be displayed in the space below the search. Each result will display the user’s avatar, and site information.
- To the right you will find the list of available tiers. By default, the tier names have a red X indicating they are not a member of that tier.
- Click the tier name to add the user to that tier. Selected tiers will show with a green check mark.

Bulk Tier Management
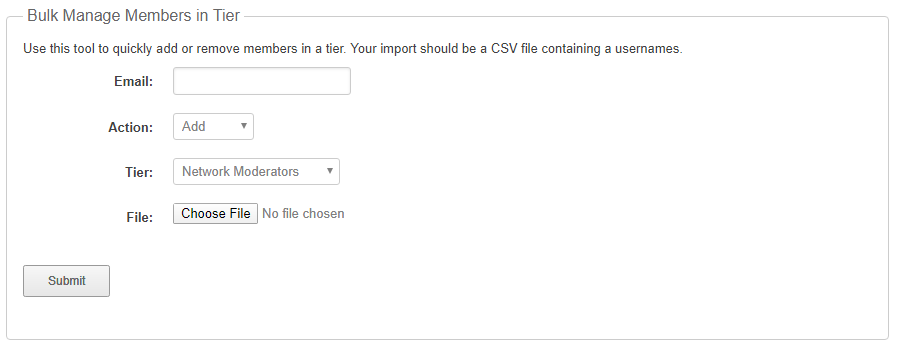
The Bulk Tier Management tool was designed to allow networks to add or remove large numbers of users from a tier at a time.

- Email: Set where the confirmation email will be sent when the bulk change has been completed.
- Actions: Add or Remove your submitted list of users.
- Tier: Select the tier you wish to bulk manage.
- File: Users should be saved in a comma delimited format or CSV.
- email addresses
- usernames
- user URLs
username,username,URL,emailaddress@company.com,username,URL