- Home
- Guides
- CMS
- Site Guide
- Menu Manager
Overview
The Menu Manager feature allows a network operator to build out fully customized menus for use on their site.
This feature can be accessed from the Control Panel at Site Builder > Menus.
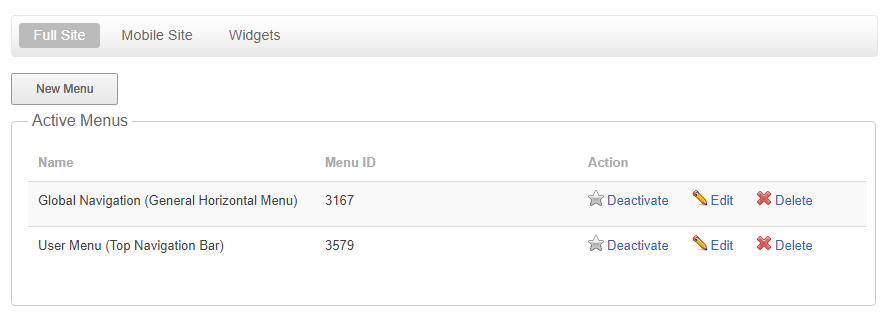
The Menu Manager allows you to create multiple menus and activate or deactivate them as needed.
Choosing the Right Menu for Your Site
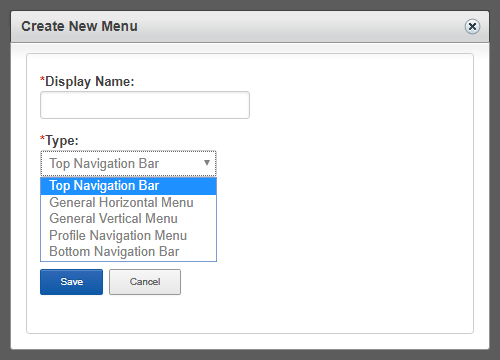
There are 5 types of menu available:
- Top Navigation Bar – Activating this menu will override the default site navigation. This is the most commonly used menu.
- General Horizontal Menu – This menu allows you to build a custom horizontal menu. It will pull in styling similar to the Top Navigation Bar.
- General Vertical Menu – This menu allows you to build a custom vertical menu. It will pull in styling similar to the Profile Navigation Menu.
- Profile Navigation Menu – Activating this menu will override the default user profile navigation menu.
- Bottom Navigation Bar – Activating this menu will override the default site footer link list.
Using the Menu Manager
- New Item
- Delete Selected
- Save Order
- Edit Menu
- Make Sticky / make Unsticky

Adding Top Level Items
Once you’ve selected a menu type, you will be able to add items to your menu by clicking New Item.
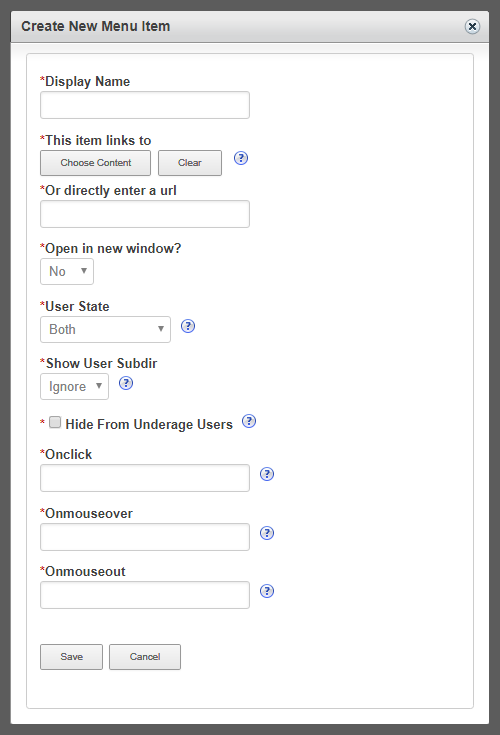
The number of options available when creating a menu item may seem daunting at first glance, however, only two items are really necessary to make a standard menu link – display name to name your link, and the URL field. The remaining options allow you to create dynamic menu lists, or change when a menu link is displayed in the navigation.
- Display Name – This is the text that will display on your menu item. For example, some networks might choose to have a menu item called Home that takes users back to the network homepage, while others might call this by the name of the network directly.
- This item links to content – This optional feature allows you to link directly to a piece of content on your network. A search window will open that will allow you to select what type of content, the search within the site for the specific item you wish to link to.
- User
- Photo
- Video
- Blog Post
- Article
- Group
- Forum Thread
- Or directly enter a URL – Enter the URL of the page you wish users to be directed to. This can be an entire URL string like ”’http://www.onesite.com”’ or a partial string to a subpage on the network like /go/network/search.
- Open in new window – When a user clicks on this menu link, should it open in a new window or the current window?
- No (default)
- Yes
- User State – This option is used to display who will see the menu item. For example, many networks like to display the Invite page link only to members who are already logged in. In this situation, user state would be set to Logged In Only.
- Both (default)
- Logged In Only
- Logged Out Only
- Blog Owner
- Group Member
- Show User Subdir
- Ignore User Subdir (default) – If this is set to “Ignore User Subdir”, then there will be no subdir attached to the link. This is used primarily for network pages or external links.
- Show User Subdir – If this is set to “Show User Subdir”, then when a user is logged in, the link will automatically be set to their subdirectory. This is primarily used for pages that are user specific (i.e., User Hub).
- Hide From Underage Users – Hides this menu item from users who are underage. This applies only to logged in users.
- Onclick – This is an optional feature that allows you to specify a JavaScript event you wish to happen when a user clicks on this menu item.
- Onmouseover– This is an optional feature that allows you to specify a JavaScript event you wish to happen when a user hovers on this menu item.
- Onmouseout– This is an optional feature that allows you to specify a JavaScript event you wish to happen when a user hovers out of this menu item.
- Exceptions – This option is only used when creating a menu item within a Profile Navigation menu. These are urls that are close to the same as your URL, and you want to exclude in the search for this URL when finding the selected tab. Separate by commas.
Adding Sub-Items
The menu system supports a multilevel menu. After creating top level menu items, you can order them by dragging to the appropriate level.
In the example below both Blogs and Groups have submenus. When a visitor to the site mouses over the navigation bar, the menu item Photo will open a container that displays all the sub-item links listed.
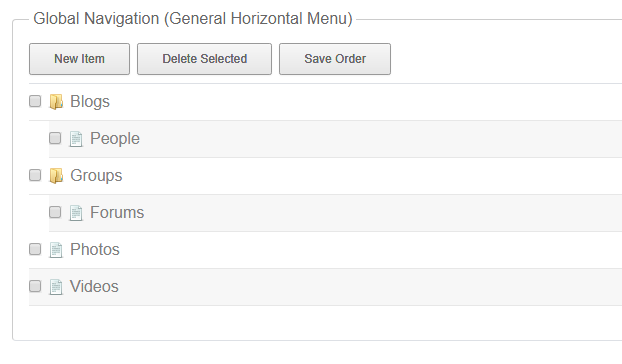
Save Order
The menu system allows users to drag and drop top level menu items or submenu items. Simply click and drag into the desired order. Once the items are in the order you prefer, click Save Order.
Make Sticky
The Make Sticky option is used with the Top Navigation Bar or General Horizontal Menu when the submenu is meant to display horizontally. This allows the correct submenu to remain visible after a visitor has moused over other options.
In the example below, the viewer is on the homepage. She can mouse over the Other Sports menu item to see all the choices within, however, when the mouse is no longer in the vicinity of the menu bar, it will return the display back to the submenu under Sport Home.

Edit Details
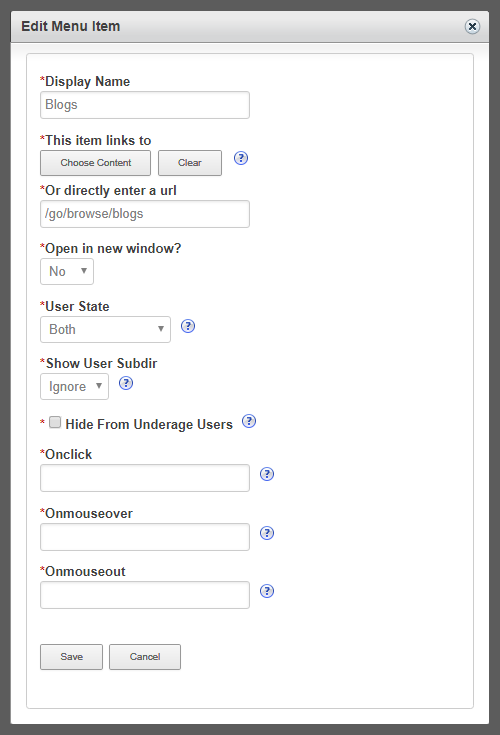
The Edit Details link on each menu item pops up the same interface you see when creating a new menu item.
Add new information or update existing fields as needed. When finished hit Save.
